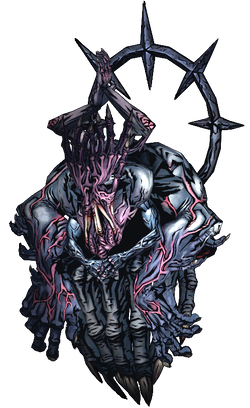
| Ravenous Reach (Phase 1) | |
|---|---|
 | |
| Stats | |
| 65 | |
| 6 | |
| Resistances | |
| 20% | |
| 20% | |
| 20% | |
| 100% | |
| 200% | |
| 75% | |
| Low ▪ Medium ▪ High | |
| Other Attributes | |
| Types | Cosmic |
| Size | 4 |
| Turns per Round | 2 |
Ravenous Reach
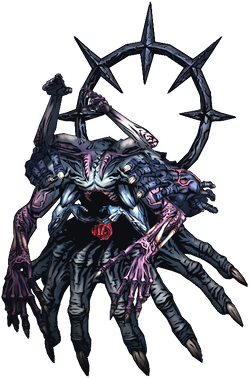
| Ravenous Reach (Phase 2) | |
|---|---|
 | |
| Stats | |
| 75 | |
| 8 | |
| Resistances | |
| 75% | |
| 75% | |
| 75% | |
| 100% | |
| Immune | |
| 20% | |
| Low ▪ Medium ▪ High | |
| Other Attributes | |
| Types | Cosmic |
| Size | 4 |
| Turns per Round | 3 |
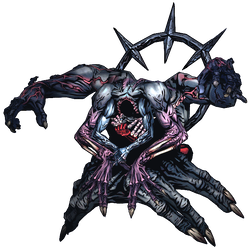
| Ravenous Reach (Phase 3) | |
|---|---|
 | |
| Stats | |
| 100 | |
| 5 | |
| Resistances | |
| 40% | |
| 40% | |
| 40% | |
| 100% | |
| Immune | |
| 40% | |
| Low ▪ Medium ▪ High | |
| Other Attributes | |
| Types | Cosmic |
| Size | 4 |
| Turns per Round | 1 |
| “ | Ambition's reach forever exceeds its terrible grasp! | „ |
| ~ The Academic |
The Ravenous Reach is the final boss of the Ambition Confession of Darkest Dungeon II.
Description
Ravenous Reach is an amalgamation of arms that generates a large amount of Positive Tokens that makes the boss more powerful. It has 3 phases and each of them makes the boss more dangerous in terms of damage and reach.
 Bastard's Beacon
The Bastard's Beacon is an Infernal Flame that gives the boss an unique modifier.
Skills (Phase 1)
Skills (Phase 2)
| Skill Name | Target | Ranks | DMG | CRIT | Self | Effects |
|---|---|---|---|---|---|---|
| Precise Intent |
or |
- | - | • Add |
Requires Target has no • Add • 1 If Target has • Add | |
| Teardown |
6-12 | 5% | Requires Target |
Skills (Phase 3)
Strategy
This is a boss who relies on buffing itself with positive tokens. Expect high damage and Knockback 3 on your front fighter during the first phase, damage and bleed to pairs of heroes in the second, and horror, bleed and damage to your whole team during the last phase.
The Highwayman is the ideal counter, able to remove any positive tokens with Highway Robbery (or steal them with the improved version), making him exceptionally useful against all three phases. Additionally, his Double Cross removes ![]() in phase 1 and his Tracking Shot not only removes
in phase 1 and his Tracking Shot not only removes ![]() in phase 2 but prevents the boss from gaining it for a short time. In phase 3, The Man-At-Arms can remove
in phase 2 but prevents the boss from gaining it for a short time. In phase 3, The Man-At-Arms can remove ![]() with Bellow. Both have their own source of
with Bellow. Both have their own source of ![]() , which is a way to remove
, which is a way to remove ![]() /
/![]() from the boss without wasting turns.
from the boss without wasting turns.
The Occultist's Vulnerability Hex can deal with both ![]() and
and ![]() , and he can heal from any position, which will be very useful against the boss' forced movement abilities. Also useful is the Vestal's Illumination, which either has the same anti-
, and he can heal from any position, which will be very useful against the boss' forced movement abilities. Also useful is the Vestal's Illumination, which either has the same anti-![]() effect as Tracking Shot, or can remove any type of positive token, depending on path. The Leper's Break also does a fine impression of Double Cross. These latter two, however, have trouble dealing with being out of position, so keep that in mind before bringing them along.
effect as Tracking Shot, or can remove any type of positive token, depending on path. The Leper's Break also does a fine impression of Double Cross. These latter two, however, have trouble dealing with being out of position, so keep that in mind before bringing them along.
You can also consider bringing attacks that ignore tokens. The Grave Robber and Duelist have options for ignoring ![]() and
and ![]() and can use their ample supply of
and can use their ample supply of ![]() to minimize the threat of Ripostes. The Man-At-Arms' Courageous Abandon can potentially deal huge damage in Phase 1, but is tricky to set up.
DoT dealers like the Plague Doctor will be useful on phases 1 and 3 since DoTs bypass
to minimize the threat of Ripostes. The Man-At-Arms' Courageous Abandon can potentially deal huge damage in Phase 1, but is tricky to set up.
DoT dealers like the Plague Doctor will be useful on phases 1 and 3 since DoTs bypass ![]() and only trigger
and only trigger ![]() once at most, but will want RES piercing for phase 2's 75% resists across the board. The boss will also lose all DoTs between phases, so use Cause of Death as soon as you can. Regular debuffs will be useful on phase 2 and 3, but the boss is very resistant to them in phase 1 (75%).
once at most, but will want RES piercing for phase 2's 75% resists across the board. The boss will also lose all DoTs between phases, so use Cause of Death as soon as you can. Regular debuffs will be useful on phase 2 and 3, but the boss is very resistant to them in phase 1 (75%).
A particular strategy for phase 1 is to make use of a Sergeant Man-At-Arms or "The General's Dream" trophy to avoid having any of your heroes displaced. This way, the entire battle dynamic changes: instead of having heroes being knocked around, ONLY the frontmost hero will be taking damage, so the other heroes can focus on damaging the boss and supporting the tank. Also note that while the attack ignores ![]() , the boss still is vulnerable to
, the boss still is vulnerable to ![]() . If you choose to bring a Sergeant, consider aiming for the Leviathan trophy "The Undertow", which will heal him every time he resists being moved.
. If you choose to bring a Sergeant, consider aiming for the Leviathan trophy "The Undertow", which will heal him every time he resists being moved.
In phase 3, you can use the trinkets Sodden Sweater or Fate's Foreteller and as many sources of ![]() RES as needed to make heroes nearly immune to the boss' attacks. Both Rumination and Riposte will heal the character when they resist the
RES as needed to make heroes nearly immune to the boss' attacks. Both Rumination and Riposte will heal the character when they resist the ![]() and Last Grasp will likely do less damage than they healed. To maximize your chances of getting these trinkets, you'll want to visit the Lair in the Shroud, and the Hoarder as many times as you can. Keep in mind Fate's Foreteller costs 65
and Last Grasp will likely do less damage than they healed. To maximize your chances of getting these trinkets, you'll want to visit the Lair in the Shroud, and the Hoarder as many times as you can. Keep in mind Fate's Foreteller costs 65![]() !
!

