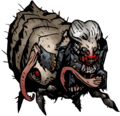
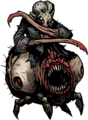
Baron
| Baron | |
|---|---|

| |
| Enemy Class | Bloodsucker |
| Size | Average (1) |
| Actions per round | |
| Stats | |
| HP | 233 |
| HP (Stygian/Bloodmoon) | 280 |
| Dodge | 22 |
| Protection | 10% |
| Speed | 10 |
| No | |
| Resistances | |
| 87% | |
| 85% | |
| 55% | |
| 60% | |
| 85% | |
| “ | They would arrive in teeming hordes, adorned in powdered wigs and pretension - seeking to slake their thirst on wine and indecency. As intoxication invariably took hold, innocuous frivolities would escalate to ever more disturbing diversions. Orchestrating the hideous affair was a hunchedbacked fiend who seemed to delight in proportion to the suffering he caused. I could have stopped him, I suppose, but I was a slave to my own appetites, and restraint would have rendered me a hypocrite.
|
„ |
| ~ The Ancestor. |
The Baron is the first Bloodsucker boss in The Courtyard, who is encountered during the "Morbid Entertainment" quest (LVL 3 Epic). When he is defeated, he drops a Set Trinket, and the quest "Served Cold" becomes available afterwards.
Reaching the Boss
The Baron is the first boss fought in The Courtyard. The greatest challenge faced by the party, oddly enough, is not the boss himself, but the dungeon he resides in. It is a truly massive dungeon with nearly a hundred rooms and many locked gates requiring special keys looted elsewhere inside the dungeon and guarded by powerful foes. The dungeon itself can be split into four distinct areas, with the Baron residing in the final area.
The first area is fairly straightforward, appearing as a somewhat straight path with a few side rooms. Keep moving to the right whenever possible to reach the second area. Beware of Bloodsuckers and traps, but there are no unusual challenges.
The second area is more difficult, taking the form of a circle with the central path cutting through. In the centre is a locked door requiring a red key found elsewhere. To progress, either move down to find the key or go slightly above where the key is found to bypass the locked door entirely. Either way, a mini-boss will block the way to the third area; the Crocodilian.
The third area is a central hub with a locked door, two wings above and below, is much more difficult, and requires multiple keys. Travel down to the bottom wing to find the blue key, then head up again to the upper wing to find the yellow one, but beware, another Crocodilian guards it. Come back on the main path to unlock the central door to progress to the final area.
The final area takes the form of extremely difficult multiple looping circles with the final boss in the middle behind a locked door. Head up to find the key to the Baron, then take the central path around to unlock the door leading to the Baron.
One special mechanic of this map (and other Epic length boss expeditions in the Courtyard) is that if you abandon the mission, the next time you go back you will start the mission from right where you left off, with all previously uncovered rooms, paths and curios still revealed. The party will not suffer from a stress penalty, but there will be a quirk check and the next expedition will cost you an additional invitation.
| Baron Map layout (Korean annotations) |
|---|

|
Fighting The Baron Himself
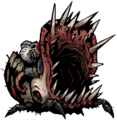
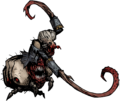
The Baron is an interesting boss, relying on his massive health pool and a few new tricks. Upon entering the room, he will be standing there with three Insect Pods behind him, which will deny the use of any healing skill while one is on the field. Once the battle begins, he will immediately use the ability "The First Act" to spawn a fourth pod in his place and hide among them. The pods themselves are easily ruptured with a single attack, but hide the true threat within: each pod can contain Sycophants or Supplicants, which will attack the party the following turn, and will not take damage from the attack that burst the pod but will be affected by any Bleed or Blight effects used on the pod. You cannot simply stall and ignore the pods to heal stress, either, as if you fail to destroy any pods on a turn, the Baron will use the move "Guests of Honor" to immediately rupture all of them, revealing himself and the extras. This is a very dangerous situation, as you will most likely face a massive onslaught of attacks from the boss and his minions at the same time, without having the comfort of killing them one at a time. It is thusly wise to slowly pop each pod one at a time to reduce the danger to the party.
Once the Baron has been found, he will attack with three actions per round. Once he is brought down to three-fourths health, he will use the ability "The Second Act" to once again hide inside Insect Pods. This is the same trick as last time, but with more dangerous enemies hiding inside the pods, such as Esquires.
Rupture the pods until he is found, and the battle begins again. He will use more dangerous attacks more often, but his weakness betrays him. Once he is brought down to half health, he will activate "The Third Act" and yet again retreat into Insect Pods, this time containing the most powerful Bloodsuckers.
Once he is revealed, the Baron will attack with his most powerful abilities until he is dead. They are not the most powerful attacks, but with 3 attacks per turn and a potential 11 damage on Necessary Discipline, he can do serious damage and pile on a lot of stress if he chooses to focus on one person, so bringing a high health healer, such as an Occultist or Flagellant, is recommended.
With three actions per round, bleed attacks can melt down the Baron quickly enough. Since the boss can hide in any of four pods and move around during the fight, it's important to be able to reach any rank, so Hellion, Houndmaster and Flagellant are a good choice for this fight. The Baron's attacks are not especially accurate, and Crowd Pleaser hits the entire party, so dodge buffs and riposte can be extremely effective. A combination of several Highwaymen and Men-at-Arms could kill the boss with only riposte attacks before he gets to use The Second Act.
Team Selection
Preferred Heroes
- Flagellant - Excellent multipurpose unit for the long fight.
- Vestal - There's a lot of area damage going around. Make sure to keep everyone in top shape.
- Highwayman, Man-at-Arms - Both units can set up Ripostes to heavily punish the Baron's area attacks.
- Jester - Necessary Discipline is a very heavy Stress-inducer, and he's good for countering its effects.
- Hellion - Can strike any position easily.
Reasonable Choices
- Houndmaster - Hound's Harry can break open all Insect Pods at once. Be prepared to deal with the imminent onslaught.
Discouraged Heroes
- Plague Doctor - Blight is not very useful in the fight, her Incision has limited range, and stuns without added damage are not too effective against the boss's resistance and multiple actions per turn.
- Grave Robber - She excels more in regions susceptible to Blight. Flashing Daggers is okay for aiding your Bleed units though.
After the Fight
Don't return to the Hamlet yet, as you will be unable to revisit this map afterwards. Continue exploring - behind the room that housed the Baron is a chest with a Red Key. Take that to the southeast corner of the map, and you'll use that to unlock a room containing another Crimson Court Trinket in a chest protected by a group of enemies. DO NOT USE A KEY ON THIS CHEST. If you do so, the trinket will be lost and you will only receive two generic pieces of loot.
Abilities
| Veteran Level | |||||||||
|---|---|---|---|---|---|---|---|---|---|
| Skill Name | Range | Rank | Target | Accuracy | Crit Chance |
Damage | Effect (Target) |
Effect (Self) |
Notes |
| The Show Begins | Support | 1, 2, 3, 4 | None | Hides in one of the Pulsating Eggs and creates additional one | |||||
| The Second Act | Support | 1, 2, 3, 4 | None | Spawns 4 Pulsating Eggs and hides in one of them | |||||
| The Third Act | Support | 1, 2, 3, 4 | None | Spawns 4 Pulsating Eggs and hides in one of them | |||||
| Crowd Pleaser | Melee | 1, 2, 3, 4 | 1+2+3+4 | 93.75% | 6% | 5-6, -85% DMG vs rank 4, -67% DMG vs rank 3, -33% DMG vs rank 2 | |||
| Necessary Discipline | Melee | 1, 2, 3, 4 | 2, 3, 4 | 103.75% | 11% | 5-11 | |||
| The Thirst | Melee | 1, 2, 3, 4. | 1, 2, 3, 4 | 103.75% | 6% | 5-8 |
|
||
| Forced Enthusiasm | Ranged | 1, 2, 3, 4 | 1, 2, 3, 4 (allies). | 0% | 0% | 0 | |||
| Guests of Honor | Support | 1, 2, 3, 4 | 1, 2, 3, 4 (allies) | Ruptures all existing Pulsating Eggs, releasing all enemies hiding inside | |||||
Gallery
Baron's combat animation
Using The Show Begins/The Second Act/The Third Act

Using Crowd Pleaser
Using The Thirst
Using Necessary Discipline
Defending
Pulsating Egg's combat animation


Map
Trivia
- The Baron is voiced by Youtuber/Streamer Baertaffy, whose longest and most popular series consist of Darkest Dungeon playthroughs, going well over 400 episodes and hundreds of hours of playtime. Baertaffy is also the voice of The Fanatic and the Viscount.
- There are several Esquires and Courtesans in the background during the fight. They are obviously cheering on The Baron, as they will laugh when the wrong pod is broken or when a party member gets hit, and they will jeer whenever the pod containing The Baron is broken.
- The achievement for killing the Baron , "Les Jeux Sont Faits", is a French phrase meaning "all bets are in", "the chips are down" or, literally, "the games are made". Most commonly used in casino roulette as the wheel is set into motion.