| Apprentice Level | |||||||||
|---|---|---|---|---|---|---|---|---|---|
| Skill Name | Range | Rank | Target | Accuracy | Crit Chance |
Damage | Effect (Target) |
Effect (Self) |
Notes |
| The Flesh Is Willing | Melee | 1,2,3,4 | 1+2 | 102.5% | 6% | 4-8 | |||
| The Clawing Dead | Ranged | 1,2,3,4 | 3+4 | 102.5% | 6% | 3-5 | |||
| Six Feet Under | Ranged | 1,2,3,4 | 1+2+3+4 | 102.5% | 0% | 0 | |||
Necromancer
Jump to navigation
Jump to search
| Necromancer | ||||
|---|---|---|---|---|

| ||||
| Enemy Type | Unholy/Eldritch | |||
| Size | Average (1) | |||
| Actions per round | ||||
| Stats | ||||
| Variation | Necromancer Apprentice |
Necromancer | Necromancer Lord | |
| HP | 105 | 158 | 215 | |
| HP (Stygian/Bloodmoon) | 126 | 190 | 258 | |
| Dodge | 0 | 8.75 | 22.5 | |
| Protection | 0 | 0 | 0 | |
| Speed | 8 | 9 | 10 | |
| None | None | None | ||
| Resistances | ||||
| 75% | 95% | 115% | ||
| 20% | 40% | 60% | ||
| 20% | 40% | 60% | ||
| 40% | 60% | 80% | ||
| 25% | 45% | 65% | ||
The Necromancer is an Unholy/Eldritch boss that appears in the Ruins.
The Necromancer was once a member of a delegation of scholars who collaborated with The Ancestor—only for the Ancestor to murder them in their sleep and reanimate them afterwards. Now the Necromancer resides in the Ruins, reviving the dead there forever.
Ancestor's Memoirs: The Necromancer
| “ |
Mastery over life and death was chief among my early pursuits. I began in humility, but my ambition was limitless. Who could have divined the prophetic import of something as unremarkable... as a twitch in the leg of a dead rat? I entertained a delegation of experts from overseas, eager to plumb the depths of their knowledge and share with them certain techniques and alchemical processes I had found to yield wondrous and terrifying results. Having learned all I could from my visiting guests, I murdered them as they slept. I brought my colleagues back with much of their intellect intact - a remarkable triumph for even the most experienced necromancer. Freed from the trappings of their humanity, they plied their terrible trade anew: the dead reviving the dead, on and on, down the years. Forever.
|
„ |
| ~ The Ancestor |
Behavior
The Necromancer will always start in position 1. Each time he uses an attack, he will create a skeleton enemy in rank 1 and move himself back 1 rank. Corpses do not block his summoning; they will simply be replaced by newly summoned skeletons. The only cases in which he will not summon a new skeleton is if he is stunned, or if there are already 3 skeletons in the enemy ranks.
The Necromancer notably has no weighted skill selection or targeting, making his series of attacks effectively random.
On higher difficulties, the Bone Soldiers summoned by the Necromancer have Stealth for 2 rounds. All of the Necromancer's summoned minions are life-linked to him and will die when he is killed.
Strategy
The Necromancer, being the first boss that most players unlock, is relatively weak, and many strategies can work against him. The most accessible strategies involve heavily concentrating damage on the back rank—a good strategy in Darkest Dungeon in general, and the Necromancer can be seen as a DPS check of the party's backline damage.
The Necromancer's resistances are all relatively low, aside from his fairly high resistance to Stun. While the Necromancer is weak to both Bleed and Blight, it is not advised to bring a Bleed-reliant party into the Ruins. His infrequent actions make ![]() Mark and debuffs effective, and his area-of-effect attacks make him vulnerable to
Mark and debuffs effective, and his area-of-effect attacks make him vulnerable to ![]() Riposte. While his low resistance to Movement makes him vulnerable to being pulled forward, he will continue to move back every turn regardless, even if the ranks are full. Thus he must be constantly pulled forward is this approach is to be used.
Riposte. While his low resistance to Movement makes him vulnerable to being pulled forward, he will continue to move back every turn regardless, even if the ranks are full. Thus he must be constantly pulled forward is this approach is to be used.
His skeletons can usually be completely ignored, as with sufficient firepower hitting the back ranks, the Necromancer should die before the skeletons deal much damage to the party. This is comparably much easier than chopping through his ever-respawning army of skeletons.
At higher levels the Necromancer may summon other skeleton types like Bone Captains. Notably, Bone Defenders on higher levels can ![]() Guard the Necromancer—stuns or the Shieldbreaker's Puncture are required to remove the
Guard the Necromancer—stuns or the Shieldbreaker's Puncture are required to remove the ![]() .
.
Team Selection
Preferred Heroes
- Arbalest/Musketeer - Incredible damage against backline targets, especially in combination with
 Mark.
Mark. - Crusader - Able to hit both the front and back ranks with bonus damage to Unholy enemies. Note that repeated uses of Holy Lance requires dance-capable partners to be effective.
- Grave Robber - Able to deal heavy damage to every rank.
- Hellion - Able to deal heavy damage to every rank.
- Highwayman - Another hero that can deal good damage to every rank. The Necromancer tends to use AoE attacks that hit both frontliners or both backliners, so his
 Riposte is also easier to trigger.
 - Houndmaster - He can attack any rank with Hound's Rush with a strong Mark synergy.
- Occultist - Vulnerability Hex is a great Mark. Hands from the Abyss is also one of the few stuns that has a good chance of breaking through the Necromancer's high stun resistance.
- Plague Doctor - Can hit every rank with heavy Blights, very quickly melting down the Necromancer.
- Shieldbreaker - Yet another hero who can attack any rank for good damage. She also has Puncture, which can pull the Necromancer while breaking and preventing
 Guard.
Reasonable Choices
- Abomination - While he lacks back line damage, the transformed version of the Abomination is one of the few heroes who deals enough damage to reliably clear away the summoned skeletons.
- Antiquarian - Can contribute some damage via Festering Vapours. Can also be run as part of a full-DODGE party with Invigorating Vapours, completely breaking the fight.
- Bounty Hunter - When stacked, Caltrops can deal a significant amount of damage. He can also reliably pull the Necromancer or Mark him for other characters.
- Jester - Battle Ballad is always useful, and the Jester can use Finale to finish off the Necromancer.
- Leper - Not ideal because he can't hit the back ranks. However, he has enough damage to clear skeletons and is a generally strong support character.
- Man-at-Arms - A strong support. Can also contribute damage via Riposte.
- Vestal - Doesn't contribute much in the way of offense. Nevertheless, her strong healing can sustain the party if the fight drags on for a while.
Discouraged Heroes
- Flagellant - While the Necromancer does have low Bleed resistance, Bleed is generally not effective against enemies in the Ruins.
Trophy
After the Necromancer's Champion-level quest is completed, he will drop his collar as a Trophy.
| Necromancer's Collar |

|
|
Abilities
| Veteran Level | |||||||||
|---|---|---|---|---|---|---|---|---|---|
| Skill Name | Range | Rank | Target | Accuracy | Crit Chance |
Damage | Effect (Target) |
Effect (Self) |
Notes |
| The Flesh Is Willing | Melee | 1,2,3,4 | 1+2 | 108.75% | 12% | 5-11 | |||
| The Clawing Dead | Ranged | 1,2,3,4 | 3+4 | 108.75% | 12% | 4-7 | |||
| Six Feet Under | Ranged | 1,2,3,4 | 1+2+3+4 | 108.75% | 0% | 0 | |||
| Champion Level | |||||||||
|---|---|---|---|---|---|---|---|---|---|
| Skill Name | Range | Rank | Target | Accuracy | Crit Chance |
Damage | Effect (Target) |
Effect (Self) |
Notes |
| The Flesh Is Willing | Melee | 1,2,3,4 | 1+2 | 122.5% | 14% | 7-15 | |||
| The Clawing Dead | Ranged | 1,2,3,4 | 3+4 | 122.5% | 14% | 5-10 | |||
| Six Feet Under | Ranged | 1,2,3,4 | 1+2+3+4 | 122.5% | 0% | 0 | |||
The Necromancer's summoning will occur regardless of whether the attack hits a hero or not. The exact enemies summoned vary depending on the boss's difficulty:
| Difficulty | Bone Rabble |
Bone Soldier |
Bone Defender |
Bone Captain |
|---|---|---|---|---|
| Apprentice | 33.3% | 66.7% | ||
| Veteran | 20% | 60% | 20% | |
| Champion | 57% | 29% | 14% |
Barks
Every base game hero (and the Musketeer) has a unique bark as a reaction to each of the Necromancer's attacks. The two DLC heroes—the Flagellant![]() and the Shieldbreaker
and the Shieldbreaker![]() —don't have unique reactions and can only use generic barks. Some heroes share their unique and generic barks.
—don't have unique reactions and can only use generic barks. Some heroes share their unique and generic barks.
| Class | Bark |
|---|---|
| (All) | "...unearthly cold!" "What can one do against such reckless hate?" |

|
"My mind's pillars crumble beneath the weight of my fate!" |

|
"I feel his evil pouring forth from the censer!" |

|
"My heart burns with regret!" |

|
"Unearthly cold!" |

|
"It wields evil like fire!" |

|
"Agh! How dare you touch me!" |

|
"It grasps at my soul!" |

|
"Reanimated bones...how can such a thing exist!?" |

|
"We are alone in our empty pursuit of justice!" |

|
"It reflects our hatred back at us!" |

|
"I can hear its soul! Screaming out in pain!" |

|
"Its evil nature defies my tactics!" |

|
"There is no courage inside me! None!" |

|
"It conjures a fell energy!" |

|
"Aah! It raises blisters with a touch!" |

|
"(gasp) It steals my breath!" |
| Class | Bark |
|---|---|
| (All) | "Anchor me, friends! Don't let them pull me down!" "Fiends from the Pit, you shall not have me!" |
|
|
"For all of my other's sins, I am beyond forgiveness!" |
|
|
"I am still corrupted by the will of my long-dead master!" |
|
|
"All of my regrets! My misdeeds!" |
|
|
"Brace yourselves! Stand your ground!" |
|
|
"Fiends from the Pit, you shall not have me!" |
|
|
"Anchor me, friends! Don't let them pull me down!" |
|
|
"It has enslaved the spirits of dead warriors!" |
|
|
"Gods! The earth crawls with these bastards!" |
|
|
"No comrade would see to our backs!" |
|
|
"You think you know evil. And then..." |
|
|
"Helpless souls! It binds them to its will!" |
|
|
"I can hear the screams of my brothers!" |
|
|
"It is a mirror showing me my infinite flaws!" |
|
|
"These black arts... Fascinating and terrifying..." |
|
|
"Even putting bones in the ground is no defense!" |
|
|
"Fiends from the Pit, you shall not have me!" |
| Class | Bark |
|---|---|
| (All) | "I see my doom!" "Must it all end in such blackness?!" |
|
|
"I fear I am merely a figment of its unholy imagination!" |
|
|
"I killed him... please let him stay dead!" |
|
|
"Why did I run away?!" |
|
|
"Grim visions... But they are mere tricks." |
|
|
"I see... I see an old man, alone on his death bed!" |
|
|
"One tomb too far... My final resting place?" |
|
|
"It speaks of my death. And I am unafraid!" |
|
|
"I... I see my death! Stabbed in the back by an ally!" |
|
|
"This world is for the cold and hard, not the idealist!" |
|
|
"It shows me my death! Pain... such horrible pain!" |
|
|
"It whispers of my death. But I know it well." |
|
|
"Is it to be my death? At long last?" |
|
|
"Why did I feel I had to prove myself to the club?!" |
|
|
"What is this vision? Torn apart from the inside??!" |
|
|
"It whispers my doom. We are all but dust." |
|
|
"Must it all end in such blackness?!" |
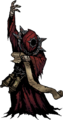
Gallery
Necromancer's combat animation

The Necromancer using The Flesh is Willing
The Necromancer using The Crawling Dead and Six Feet Under
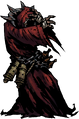
The Necromancer defending


