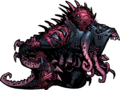
Shuffling Horror
| Shuffling Horror | |
|---|---|

| |
| Enemy Class | Eldritch |
| Size | Gigantic (3) |
| Actions per round | |
| Stats | |
| HP | 162 |
| HP (Stygian/Bloodmoon) | 195 |
| Dodge | 23.75% |
| Protection | 33% |
| Speed | 2 |
| No | |
| Resistances | |
| 147.5% | |
| 107.5% | |
| 67.5% | |
| 87.5% | |
| 98% | |
Not even it could escape the corruption; the Shambler, the most feared, terrifying beast that lurks within every shadow of the Estate has fallen to the corruption and become one of the thing’s protectors. More than any of this, it shows the true nature of the thing that sleeps within the Darkest Dungeon, a parasite that is slowly consuming the flesh of its host and replacing it with its own cancerous growths.
Behavior
The Shuffling Horror is the first of four bosses that Darkest Dungeon has. It has 2 moves in a single turn and 3 different attacks.
- If the Priest is left alive, the Shuffling Horror's attack pattern will remain always the same making it a very predictable enemy. Since both of Lacerate and Undulations have a 1 turn cooldown, he will alternate between each of them every one of his turns. Therefore expect the following succession of Bleed-Shuffle-Bleed-Shuffle for this fight.
- Should you decide to eliminate the troublesome Priest, the Shuffling Horror will always summon another monster right away with Echoing Disassembly. Although coded to only use it if he is alone, it might be possible that it keeps using it every other turn after the summon, dealing heavy stress across the party.
Strategy
Shuffling Horror spawns with a Cultist Priest. If he is killed, the Horror will just summon another enemy, making it pointless. The better way to deal with him is to stun the Cultist Priest every other turn. To this end, the Plague Doctor can prove herself particularly useful, being able to stun both targets at once with the right trinket selection (i.e. Blasphemous Vial and Stun Amulet)
As the name indicates, this particular boss is especially adept at disrupting your hero's party order, shuffling them with Undulations. It has two actions per turn, does massive stress damage with Echoing Disassembly and inflicts bleed when Lacerating your party members. As common with most two-action enemies, debuffs and stuns will not be very effective. Bleeds, on the other hand, proc twice per turn making it excellent choice. Blights are slightly less effective because of higher resistance. Additionally, it might be a good idea to decrease the Horror's PROT with a mark, as he is fairly slow and the party has a decent chance to capitalize on the mark before it runs out.
It is recommended to bring Heroes who can attack from multiple positions (Bounty Hunter, Hellion, Grave Robber). Heroes like the Leper and Arbalest would be ineffective. Relying on both Man-at-Arms' and Highwayman's Riposte skills is another viable strategy, as all of the Horror's attacks target the whole party. Riposte can kill the Cultist Priest however, resulting in a strong stress-dealing attack from the Horror.
If you're already familiar with fighting the Shambler, preparation and combat strategies for the Shuffling Horror is similar, but also significantly easier - You'll know when the fight's coming, aren't shuffled from the get-go, have fewer targets to handle, and have the benefit of Torchlight.
The fight is not over if the Horror dies, as the Cultist Priest it summons will remain to clean up any stragglers. As long as you've killed the Horror, though, the game will recognize the quest as complete, even if they were all killed by the Cultist Priest afterwards.
Team Selection
Preferred Heroes
These Heroes are capable of acting in many positions, or have good mobility to recuperate from a shuffle.
- Jester - Finale can be used easily as the boss shuffles your party often.
- Highwayman - Riposte from Duelist's Advance is useful against the party-wide attacks that the Horror does, though it may kill the Cultist Priest.
- Grave Robber - Can reliably deal damage from any position, and has armor penetration on her Pick to the Face.
- Shieldbreaker
 - Can easily reposition, also pierces through Horror's PROT with Pierce or give the party armor penetration through her camping skill.
 - Man-at-Arms - Has Riposte as well.
- Crusader - Holy Lance is the movement skill of choice here. Also has backup healing and Stress relief.
- Occultist - Can heal from anywhere and even has bonus damage on the Horror.
- Hellion - Can use Breakthough to get back into position.
Reasonable Choices
- Flagellant
 - Can return to the frontlines in a single step. Excellent heals and Stress relief as a front-liner too.
 - Bounty Hunter - Able to act from positions 1 to 3 and can deal increased damage to the Horror with Planned Takedown.
- Abomination - Bear in mind that he loses a lot of skill use if he's forced to position 4.
Discouraged Heroes
These Heroes are not ideal due to their position restrictions or low movement.
- Leper - He can only attack while in the front two ranks.
- Vestal - Reliable healing is still very important, especially in the Darkest Dungeon. Equip frontline skills just in case.
- Arbalest/Musketeer - Cannot use most of their skills if they are shuffled to the front ranks.
Ancestral Trinkets
As with the Shambler, the Shuffling Horror carries with him Ancestral Trinkets. However, since only one of each trinket can exist in the player's inventory, when they are all obtained, the Shuffling Horror will not drop any Ancestral Trinkets unless one of the trinkets is lost.
| Ancestor's Map | Ancestor's Bottle | Ancestor's Candle | Ancestor's Tentacle Idol | Ancestor's Scroll |

|

|

|

|

|
|
|
|
|
|
Abilities
| Darkest Level | |||||||||
|---|---|---|---|---|---|---|---|---|---|
| Skill Name | Range | Rank | Target | Accuracy | Crit Chance |
Damage | Effect (Target) |
Effect (Self) |
Notes |
| Lacerate | Ranged | 1, 2, 3, 4. | 1, 2, 3, 4, 100% +1 Target. | 110% | 5% | 5-9 | No Effect | ||
| Echoing Disassembly | Ranged | 1, 2, 3, 4. | 1+2+3+4. | 120% | 7% | 1-3 | No Effect | ||
| Undulations | Melee | 1, 2, 3, 4. | 1+2+3+4. | 110% | 0% | 1 | No Effect | ||
Gallery
Shuffling Horror's combat animation
Using Undulations
Using Lacerate

Using Echoing Disassembly
Defending


