| Countess | |
|---|---|
| |
| Enemy Class | Bloodsucker |
| Size | Unimaginable (4) |
| Actions per round | |
| Stats | |
| HP | 400 |
| HP (Stygian/Bloodmoon) | 480 |
| Dodge | 25 |
| Protection | 30% |
| Speed | 4 |
| No | |
| Resistances | |
| 140% | |
| 110% | |
| 90% | |
| 120% | |
| 220% | |
| Countess | |
|---|---|

| |
| Enemy Class | Bloodsucker |
| Size | Unimaginable (4) |
| Actions per round | |
| Stats | |
| HP | 400 |
| HP (Stygian/Bloodmoon) | 480 |
| Dodge | 25 |
| Protection | 30% |
| Speed | 4 |
| No | |
| Resistances | |
| 140% | |
| 110% | |
| 90% | |
| 120% | |
| 220% | |
| Countess | |
|---|---|
| |
| Enemy Class | Bloodsucker |
| Size | Unimaginable |
| Actions per round | |
| Stats | |
| HP | 400 |
| HP (Stygian/Bloodmoon) | 480 |
| Dodge | 0 |
| Protection | 10% |
| Speed | 1 |
| No | |
| Resistances | |
| 145% | |
| 110% | |
| 90% | |
| 120% | |
| 220% | |
| Countess | |
|---|---|
| |
| Enemy Class | Bloodsucker |
| Size | Unimaginable |
| Actions per round | |
| Stats | |
| HP | 400 |
| HP (Stygian/Bloodmoon) | 480 |
| Dodge | 30 |
| Protection | 40% |
| Speed | 8 |
| No | |
| Resistances | |
| 165% | |
| 120% | |
| 80% | |
| 140% | |
| 220% | |
| “ | In those younger years my home was a hive of unbridled hedonism, a roiling apiary where instinct and impulse were indulged with wild abandon. A bewitching predator slipped in amidst the swarm of tittering sycophants. Though outwardly urbane, I could sense in her a mocking thirst. Driven half-mad by cloying vulgarity, I plotted to rid myself of this lurking threat, in a grand display of sadistic sport. But as the moment of murder drew nigh, the gibbous moon revealed her inhuman desires in all their stultifying hideousness. Mercifully, the morbid encounter resolved itself in my favor, and I set to work pursuing degeneracy in its most decadent forms. The air pulsed with anticipation as I revealed the unnatural terroir of the house vintage. But my exultation was cut short, as the attending gentry turned upon themselves in an orgy of indescribable frenzy. A single drop of that forbidden tannin gifted me with a dizzying glimpse of the hibernating horror beneath my feet and in that moment, I understood the terrible truth of the world. I stood reborn, molted by newfound knowledge. My head throbbing to the growing whine of winged vermin come to drink the tainted blood... of the Darkest Dungeon.
|
„ |
| ~ The Ancestor. |
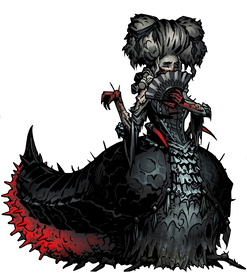
The Countess is the third and the final boss of The Courtyard fought during the "Bewitching Predator" (LVL 6 Epic) quest. An insectoid vampiress, she is the source of the Crimson Curse, as her corrupting blood was spread around the Courtyard's guests by the Ancestor's machinations, following her murder by his hands. Her coming back to life triggers the events of the Crimson Court DLC.
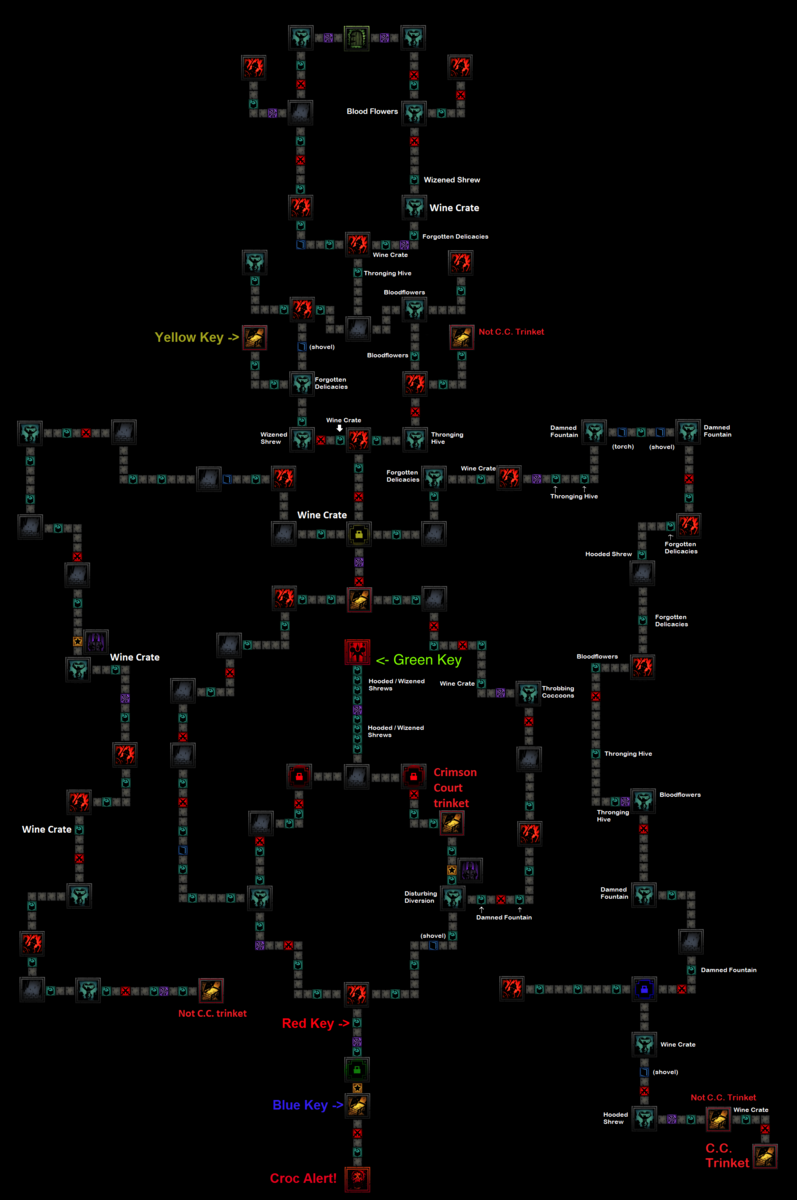
The route to the Countess is a fairly long but straightforward one. The map is largely symmetrical barring the paths branching out to either side. Your main goal is to defeat the Countess, located in the very center of the map.
Start with traveling down the west side of the map. Ignore the first two side branches as it leads to a dead end. The third leads to a chest holding the yellow key. With that in tow, journey south, unlocking the gate. Don't travel to the sides, as they are incredibly long corridors that lead to dead ends. Instead, go south from the yellow gate room, then take either the east or west branch, and ignore any northbound branch at the next T-junction. You will eventually come across a chest in a corridor holding the red key. Collect it and backtrack, for the upcoming green gate cannot be opened yet. Travel north, unlock a red gate on either side (head for the east gate for a chest containing a Crimson Court trinket), and from then on it's a straight corridor leading right to the Countess.
The Countess will be a tough battle, so you will need to take a moment to camp. It's a long distance between the Countess's room and any Wine crates, so if you have to retreat to the Hamlet due to the battle going awry, you will need to prepare for a lot of backtracking on your next venture into the Courtyard.
| Countess Map layout |
|---|
|
She has three forms, each with unique attacks, stats, and resistances.
She starts in a Thirsty form, with 3 actions per round. In this form, she injects a Parasite Egg to a hero, dealing damage over time until it rips off, dealing massive damage. She can also apply Stumble, which could be seen as a Shuffle DOT, i.e. every turn the hero affected will be shuffled, making party compositions that rely on a stable position bad for this boss fight. The abilities Sway with Me and Love Letter can no longer be riposted as of The Color of Madness update. After that, she will change form to Flushed.
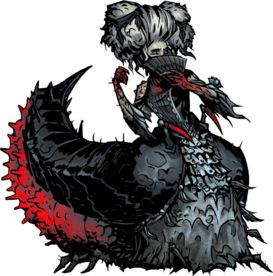
In her Flushed Form, she has only one action per round, and it's her weakest form because she has no way to deal HP damage. When transforming to Bloodlust Form, she applies Horror and cures status effects such as Bleed and Blight. However, the transformation ability, Metamorphosis has 0% accuracy and hits very rarely.
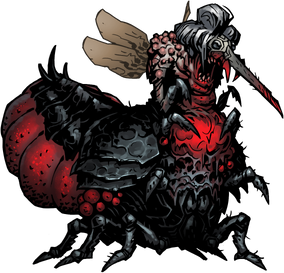
Bloodlust Form is her most dangerous form, having 4 actions per round, plus increased stats and resistances. She has many attacks that deal massive damage, can stun two heroes at the same time, and can reach 75% PROT thanks to the Parasite Egg when it rips off from the hero.
As the Countess has 3-4 rounds and a large amount of protection, bleed damage or direct armor piercing proves to be effective against her. Certain heroes such as Flagellant and Hellion can deal large amount of bleed, but can be easily disrupted by the Shuffle status effect, so it should be taken into account if you use these heroes. It can be useful to have abilities that reposition the heroes affected by shuffles, such as Crusader's Holy Lance or Shieldbreaker's Pierce; abilities normally used in suboptimal positions, such as Vestal's Mace Bash; or bringing move resist trinkets such as Heavy Boots. Flagellant's massive heals can help a lot to deal with amount of damage the Countess has, but as they have limited uses, it's recommended to bring a Vestal to keep your party alive.
When the Countess enters the Flushed form, she cures all DoTs, but loses a bunch of resistances, including Stun resist. You can try to keep her stunned in this form to delay the big damage output from Bloodlust form and stack a lot of DoT. In the Bloodlust form, the Countess gets access to a backline stun, so it can be useful to boost stun resist on your backliners with trinkets (Stun Amulet or Wilbur's Flag).
Another strategy is to stack a lot of dodge buffs: Antiquarian, Houndmaster and Man-at-Arms are the key heroes here. If you have the luxury to camp, stacking the Man-at-Arms's Tactics buff with his own Bolster ability is a long-lasting defensive asset, especially since Bolster will help weather the Stress damage happening throughout the fight. If you have The Color of Madness DLC, you can purchase the Shard Dust to refresh MAA's Bolster ability and use it multiple times during the battle. Accuracy debuffs, however, aren't that effective since the Countess has multiple actions.
Parasite Egg will deal damage to a hero every time they attack and has a chance to hatch for higher amount of damage and a large debuff for ACC and SPD (chances and effects listed below). Healing, buffing or moving doesn't trigger the egg gestating/hatching. Be aware of possible hatching when you are going to attack with a hero that has an egg on themselves, and remember that the damage caused by the egg can kill a hero on Death's Door. If you caught an egg with your Vestal, you can ignore it and only heal with her, so the egg will never hatch. If you have the Shieldbreaker DLC, you can use Aegis Scales to block the damage from the egg - it will not prevent the debuff, but can save a hero from a certain death.
One viable party composition for Bloodmoon Countess is Vestal / Man-at-Arms / Hellion / Flagellant. The MVP here is the Man-at-Arms, who will need to first use Bolster and then Guard the Vestal. Remember to equip him with something like Dazzling Mirror. When the Countess is in her Flushed form, land the stun and the fight will be much easier.
If your party is still roughly in one piece after the battle or can efficiently sustain themselves for the upcoming journey, you can carry on adventuring and explore the rest of the level. The Countess's room contains a chest with a green key. This opens the green door on the south end of the map, leading you to a blue key that opens the blue door in the depths of the far east corridor. Behind that locked door is a chest containing a Crimson Court trinket. If you feel brave enough, you can also challenge the Crocodilian waiting at the southmost end of the map, behind the room with the blue key, for another Crimson Court trinket.
Once you return to town after defeating the Countess, the Veil Lifted event will occur, curing every hero affected by the Crimson Curse. On top of this, the knowledge gained from fighting the source of the disease will allow the Sanitarium to cure the Curse like any other Disease. Note that only the Sanitarium benefits from this change in behavior -- the Crimson Curse still cannot be cured through Camping Skills.
As you are no longer required to hunt invites to revisit the Courtyard, the Infestation Level will disappear, and you won't have to worry about facing Bloodsuckers in the other environments or getting hunted by the Fanatic. The remaining Courtyard quest will be a repeatable Medium-length quest asking to defeat the Garden Guardian in order to earn the rest of the Crimson Court Trinkets.
| Darkest Level | |||||||||
|---|---|---|---|---|---|---|---|---|---|
| Skill Name | Range | Rank | Target | Accuracy | Crit Chance |
Damage | Effect (Target) |
Effect (Self) |
Notes |
| Flushed | Support | 1, 2, 3, 4 | Self | Cure |
|||||
| Disrobe | Melee | 1, 2, 3, 4 | 1, 2, 3, 4 | 115% | 10% | 8-16 | |||
| Sway With Me | Ranged | 1, 2, 3, 4 | 1+2+3+4 | 115% | 0% | 4-4 | |||
| Love Letter | Melee | 1, 2, 3, 4 | 1, 2, 3, 4 | 120% | 15% | 6-10 | Injects a Parasite Egg | Lose 10 HP | |
| Darkest Level | |||||||||
|---|---|---|---|---|---|---|---|---|---|
| Skill Name | Range | Rank | Target | Accuracy | Crit Chance |
Damage | Effect (Target) |
Effect (Self) |
Notes |
| Momentary Overexertion | Ranged | 1, 2, 3, 4 | Self | 0% | 0% | 0 | |||
| Metamorphosis | Ranged | 1, 2, 3, 4 | 1+2+3+4 | 0% | 0% | 0 | |||
| Darkest Level | |||||||||
|---|---|---|---|---|---|---|---|---|---|
| Skill Name | Range | Rank | Target | Accuracy | Crit Chance |
Damage | Effect (Target) |
Effect (Self) |
Notes |
| Indecent Proposal | Melee | 1, 2, 3, 4 | 1+2+3+4 | 115% | 3% | 3-13, (-45% DMG vs Rank 4, -30% DMG vs Rank 3, -15% DMG vs Rank 2) | |||
| Courtship Renewed | Support | 1, 2, 3, 4 | Self | ||||||
| Disrobe | Melee | 1, 2, 3, 4 | 1, 2, 3, 4 | 110% | 15% | 10-14 | |||
| The Thirst | Melee | 1, 2, 3, 4 | 1, 2, 3, 4 | 110% | 2% | 7-17 | |||
| Throes of Ecstasy | Ranged | 1, 2, 3, 4 | 3, 4, 33% +1 Target | 118% | 5% | 2-4 | |||
The Parasite Egg is injected into a hero when the Countess uses Love Letter. Every turn that the hero attacks, this Parasite does damage to them at the end of their turn, and each turn has an increasing chance to hatch, removing the egg but dealing massive damage and buffing the Countess for +3 SPD and +15% PROT. As only attacking will progress the egg's growth, buffing or healing won't trigger the hatch or gestation.
| Parasite Egg Effects | ||||
|---|---|---|---|---|
| Turn: | First Turn | Second Turn | Third Turn | Fourth Turn |
| Hatching Chance |
25% Chance | 50% Chance | 95% Chance | 100% Chance |
| Gestation Effect |
4 Hp Damage | 6 Hp Damage | 8 Hp Damage | - |
| Hatching Effects |
15 Hp Damage |
18 Hp Damage |
24 Hp Damage |
24 Hp Damage |
The Countess in her human form, with a vial of the Blood around her neck